Sunday, June 9, 2013

Euphonious Mobius - Gallery

Below are some images  of Euphonious Mobius - Vivid Sydney 2013


  Below is a short video of Euphonious Mobius night view with Sydney Opera House at background: 


Public recognition

  Through out the entire project , my name has been printed in some highly public spaces as my personal recognitions :


 - Vivid Sydney, official project board


- Euphonious Mobious offical poster


- Euphonious Movious blog ( Collaborators list ) :


Feedback given from client

  For this project, Rebekah Araullo has been our client and project manager, below is the her feedback for me :

Patrick and Ricky had also dedicated their time earlier on to join the building team comprised of 7 other members. During this time, they had collaborated to ensure project requirements were met and had shown their dedication under such extreme conditions. I find them to be reliable and valuable members of the building team as well.
  For their contribution, their names are marked amongst other professionals in a highly public space which is testament to their hard work and dedication.

                                                           - Rebekah Araullo

Individual contribution - Final summary video

  In this summary video below, you can see all what I have contributed to this entire project from Day 1 :


Individual contribution - Interactivity test on site

In the video below are some tests that I've done with Euphonious Mobius on site , there you can see how my scripts work on real major project . 


Individual contribution - Grasshopper development

To light up LEDs, grasshopper is definitely needed as a platform.
Based on Felix's code, I've added an VB script which ensures grasshopper works for the aim of interactivity by using the data received from Arduino .

Firefly setup.
Firefly is a plug-in of grasshopper, it is designed for arduino connection. It opens a port, which is exactly the one for arduino and reads data from it, activates grasshopper script with its ouptus.
VB script
This is the VB script that I created within grasshopper code to ensure that it is the Arduino which actually controls LEDs. Any received data will be placed in one of these ranges and of course each of them will light up different amount of LEDs

Full grasshopper script 


Screen shot of Rhino + grasshopper script

In this grasshopper script, we have a 2D grid at the back,  with different colors changing at all times and also another grid in the color of black in the front, covers the back. What people can see are those which are not covered up. The front grid has a fixed width , but its height is controlled by the VB script that is shown above. As I've mentioned in my ping sensor post, number is the only output, the large the number is, means the further the object is from the sensor. So here, the larger the number has been sent into VB script, the lower the black grid is, the more LED will be lit up . Another issue of this script is, it judges if any objects have been detected within the range of ping sensor. If it is, it will run the VB script that I've just explained, if it cannot detect anything, it will run a rainbow loop. It would be easier for you to understand by watching the video below :


I tested it with a very low speed of moving object away from the sensor is because I want everyone can clearly recognize that the color of the back grid is changing all the time when arduino is sensing . If it's not, it runs the rainbow flashing loop.


Grasshopper script : http://www.mediafire.com/download/g74c33123v6x8qw/final_design_developed.gh

Individual contricution - Arduino development

Arduino Code :

http://www.mediafire.com/view/kapg5bkwvmct8y7/Final_arduino_code.docx

Based on the ping sensor online tutorial ( http://trollmaker.com/article3/arduino-and-hc-sr04-ultrasonic-sensor ), I've developed my arduino code with multiple LEDs. As you can see in my code, I've set up eight ranges where each one of them will light up different amount of LED, while different LEDs represent the distance range of detected object and the sensor itself. The only output we can get from it is a list of numbers, and these data will be sent over to grasshopper firefly for further development in the next stage .

Below is a video testing this code :

Individual contribution - Interactivity development

Confirmed interactivity for Vivid festival :

  The closer people standing in front of structure, the less LED will be lit up, the further , the more .

Hardware chosen : Arduino UNO
Image copied from : http://arduino.cc/en/uploads/Main/ArduinoUno_r2_front450px.jpg


Sensor chosen : Ultrasonic ( Ping ) sensor
Image copied from :http://cloud2.lbox.me/images/384x384/201208/us-100-ultrasonic-sensor-module-with-temperature-compensation-range-for-arduino_ksxpjy1346397831272.jpg


What ping sensor does is it sets off signals toward any objects that are in its sensing range, when signal bounces back to sensor, it calculates the distance of the detected object and the sensor itself. In simple terms, ping sensor tests distances. 


Here is my own setup for Arduino with ping sensor and multiple LEDs:


Individual Contribution - Structure modelling & Script testing for interactivity

  Below are some images showing me working with other team members with modelling the structure at Redfern Studio and testing grasshopper code for interactivity on site.

Structure modelling at Redfern Studio with team members .

Structure modelling at Redfern Studio with team members .

Structure modelling at Redfern Studio with team members .

Structure modelling at Redfern Studio with team members .
Soldering electrical cables and taping them down for water proof .

Because all LED cables we had are black, they have to be spray painted into white to match the color of structure.


Spray painting LED strings to white in order to match the color of structure.

Testing grasshopper script for interactivity on site .

Photo shoot of grasshopper viewport on site .

Every posts above this are materials for individual contribution and assessment .

Every blog entries that are posted on 9 June are materials for individual contribution and assessment .

Tuesday, May 28, 2013

Review on group presentation - Kinecting the boxes - Conflict

  This is the second group presenting about Conflict for this week . 
  They started with defining conflict and certain factors towards it . Couple of self-answer questions gave us a general understanding of what conflict means and how important it is to people. They've also given some options to resolve conflicts such as being open minded, focus on real issues but not on personality traits . The way two parties reacting to each other remains the same until a solution is provided. When conflict occurs within group, all need to sit down and talk to each other calmly without being angry or feeling despair. All members have to force themselves to come up with a general solution to their conflict as the best way of making sure their works are going well as planned . They've also mentioned of benefits and negatives of resolution conflict.
  For their oral presentation, I found that they had too much reading, content of oral speech is pretty much same as what they have written on presentation slides, and some of them have to raise their voice for a bit to ensure people sitting at the back could hear them clearly . 

Review on group presentation - DCLD- Conflict

In this week , we had two groups presenting issue of conflict.
For group DCLD, it's easy to tell that they are well prepared for their presentation, especially for presentation slides, well done. But unfortunately their oral presentation sounded similar to what that have written on screen, too much reading over presentation slides with low voice made it a little worse to audience . Good examples of talking about the conflict between Apple and Samsung, and it was even better to bring the definition of conflict in real with their own experience between their group members. This made us easier to understand what happened to them when data clashed on BIM and redoing tasks that were meant to be shared. Also, those images of resolution and critical path analysis provided were impressive as they are eye-catching still images. They also summarized by giving solutions of avoiding conflict within teams :

  •   Listening
  •   Open mindness
  •   Act immediately
  •   Get together and talk 1 by 1
  •   Think above other people's needs
Before the end of their presentation, they showed the list of references of images and examples that they have covered in their presentation slides, it would be better if they referenced as they go , not at the last second. But overall it was good effort, well done.   

Sunday, May 5, 2013

Euphonious Mobius-- Structural model


Self evaluation toward final project and individual contributionn


Vivid pirates

  We formed this group, Vivid Pirates, during the class in week 2, with Felix Chiu, Patrick Lu , Prevash Datt and me ( Yichao Ricky Xue ) involved. As a new member of this team, I had no idea of what Euphonious Mobius is since I was not in the same class as my other team members last year. So at the beginning stage, I spent a long time, trying to understand this concept and the structure of the model they’ve made for vivid festival 2013. By the end of that studio class, every each one of us has been assigned different works and roles for group development, and I’m responsible as a programmer / interactivity designer, 
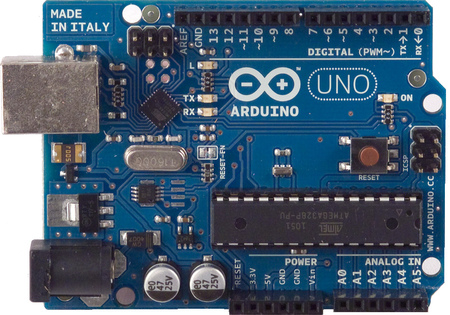
majority in grasshopper scripting. In the following week, we got some arduino kits given by Mr.Russel as one of our tools to work toward ideal interactivities.
  Having understood how will arduino benefit our structure, we ended up with three sensors and have a few ideas of interactivities assigned to each sensor, as I’ve mentioned in one of my blog entries ( Ideas for interactivities ) .
  As I’ve done some arduino work and photo resistor ( light sensor ) in the past few years, I took the responsibility of working on it for interactivity creation.
  Every beginning is difficult, I got many problems with my arduino kit such as data not sending to grasshopper, before moving on to the next step, I decided to look for some tutorials of arduino and grasshopper firefly.
  Yes , of course I’ve got those basic issues solved later on and started to move onto interactivity creating stage. Originally , my idea was to run multiple LEDs on my arduino board straight away without firefly, therefore I went online and bought couple of big arduino bread boards and a pack of RGB LEDs for my development. As I was moving on, I found out it is really hard hooking hundreds of LEDs on arduino for coding and making interactivity by using various of sensors. I had a talk with Felix, our team leader and programmer, and I was told that large amount of LEDs could be controlled by light controller via Rhino grasshopper.
  Got an easier way, why don’t we do it . I started to write scripts on grasshopper instead of arduino. With the help of Steve during studio session, I’ve created a smooth code of shooting star, and another script for twinkle interactivity, the original scripts was written by Prevash , and I’ve improved it by adding a basic if statement and hooking up with light sensor via arduino. Both of these two developments could be found on my individual blog. Both of them looked well on screen but we still have to make sure that they fit our grid and real structure.
  Right now in week 8 , me and our group , VividPirates have almost done with interactivity designing and program scripting, our next step is to put what we have already created onto our structure and see if they fit our expectations. And of course, I will keep working on scripting and coding and do whatever I could to help my team reach the final aim.
  During extracurricular sessions since week 3, I’ve been working with Rebekah and her team member for structure modeling at Redfern studio for Vivid Sydney 2013, improving my understanding toward this project and refreshing my mind when designing interactivities based on real structure. I’ve had a lot of fun from it . 

Vivid Sydney 2013

Vivid 2013 - Structure modelling at Redfern studio


Me connecting LED wires


Meeting with sound artist and visual artist

Twinkle with light sensor

Interactivity idea : Twinkle

Original idea before coding :


Grasshopper output:


Grasshopper file:

http://www.mediafire.com/?5ap2vebjmrjac5m

Self reflection:

  The script of twinkle ( flashing squares ) is done by Prevash and Felix, what I added on is the VS script, in other words, an if statement in the script which estimates the light level of photo resistor,it works like it determines if light level is less than A, lights off, if it's greater than A, it flashes, also it will be controlled by plugged-in arduino board.

Shooting star with light sensor

Interactivity idea : Shooting star

Original idea before coding :


If people move closer to the structure, standing in the range of light sensor, it activates the grasshopper script of shooting star , and when they leave the range, system turns off.

Grasshopper output:


Grasshopper file :

http://www.mediafire.com/?xa82x3v67rc26je

Self reflection:

  Originally I was developing on the code which was written by Felix, but as what Steve said to me after checking this one, our code worked but it is not transforming smoothly like a natural shooting star. Therefor with the help of Steve, I created this script with color flashing cube as star and Rhino curves as paths.

Ideas for interactivities